One can apply material (finishes) to almost any object in Revit. It basically comes down to assign material to the elements. Depending on the type of family in Revit, there are different way of accessing the material parameter in the family. Have you ever had a need to try to use the same material across different category of element? This process could get pretty tedious sometimes. For example, I have a wood floor finish that wants to be used as wood panel on the wall; To do so, you will have to assign the same material to both wall and floor type. In order to access the material setting for system families like wall, floor, ceiling and roof, you have to click so many times to get to the structure parameter of the layer of that particular finish. From there, you will further need to access the Material Browser and choose the desired material and click ok. Well, I think this is just too many clicks to me, especially the process is usually slower once you are inside the Material Browser.


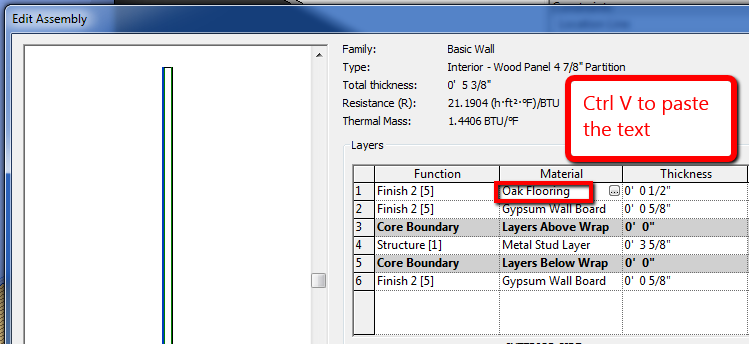
Here's a shortcut that is going to save you a lot of time. First go to select the material you want to use (from floor's properties), Highlight the text in the material field and use Ctrl + C (to copy), exit out the floor properties setting. Next, go to the material parameter that you want to place (wall properties in this case) and use Ctrl + V to paste the text in the field.
You are done!
 |
| Ctrl + V to paste material to Wall Layer |
This little trick will let you assign material without getting into the Material Browser at all. Using this method will save you lots of time during the process. You can apply the same concept on literally any kind of family with material parameter in Revit.
Enjoy!


No comments:
Post a Comment