Showing posts with label BIM Management. Show all posts

Saturday, April 16, 2022

Finding (Material) Neverland

Have you ever experienced your Material Browser taking forever to open the second you click that icon? 

One of the known issues I come across is if the project has a custom image map used for material Appearance but they are nowhere to be found, Revit is trying to find them through the path originated in its location. It will try to find them until it times out. In other words, the more missing material you have in the project, the longer for Revit to try to find them (i.e. the stalling). 

An Autodesk Knowledge Base post offers a similar explanation. 


This has become a serious headache for the user when:

  • The Revit file was upgraded many versions ago and the material referenced location does not exist.
  • The Revit file has material borrowed (or transferred) from other projects. 
  • Custom material assigned to family content from other sources (e.g. manufacturer content)

How do you resolve an issue like this?

While I haven't found an easy solution, the only way is to identify which material via Material Browser has the missing image, and replace (or repath) with the image that Revit can access. Once that is done, the material browser can operate normally. 

This can be a daunting task if the project has hundreds if not thousands of material. Can I use Purge Unused to get rid of those materials? The short answer is yes but it is only possible to purge out material that is not assigned to any Revit system or component families. Even with purge unused, there could still be a lot of missing images referenced with the rest of the material. 

There have been some postings using Dynamo to help find these images. The process still has its shortcoming. 

I came across a tweet the other day when someone mentioned using a Revit add-in Ideate BIMLink tool. I started researching that solution. 

What's interesting is this tool and its feature has been around for years. While BIMLink is a licensed Revit tool, I haven't had the chance to use it until recently. What's more, the original intent of using a BIMLink feature is to swap material assignments for custom families to aid in a quick iteration of rendered design options for casework, furniture, and lighting.


Using BIMLink
Start Ideate BIMLink (I am using the 2022 version)

Click New


Then select \06 Project Standards > Project_Stds-Materials > Next


Under the Properties tab, you can add any additional properties to the right. You can also include materials from the linked Revit model by choosing Include linked elements.
Click Done to go back to the setting. 


Once you are back to the setting, click Export
This will generate the entire inventory of the materials list from a single (or multiple) Revit files whether the material is in use or not. 


Choose a destination location to save the excel spreadsheet. 


Open the exported file in Excel. 
The image path is under Appearance: Image


This is where you can see if there are any invalid paths that are no longer accessible by the Revit file. 

Another interesting fact, I was able to identify the material pathing if these custom materials from manufacturer content are ever loaded into the file. 

This example shows the content creator from the furniture company Steelcase placed the custom image map under the person's desktop?? Seriously!?


This is another reason why I have a trusting issue with third-party content downloaded from the internet even if they are from well-known companies. 

I wrote this post years ago that explains why it is important to have a vetting process in place if your office decides to use content generated by a third party. 


In Closing

I hope this helps to resolve the issue with Material Browser which is slow to open. While the process is still tedious, it offers a more manageable way to track down a specific material with this issue. 


Sunday, April 12, 2020

BIM 360 Doc - Schedule Publish Feature

While most of us are going through the stay-at-home ordeal, this gives me some time to finish this blogpost that has been sitting in my draft folder since last December. 

It also happens to be the week Revit 2021 that is just released. Well, none of that actually has anything to do with this post.

This is one of the nice features introduced to BIM 360 doc. I don't recall when Autodesk introduced it but I have been using it for all the new projects we host on BIM 360 doc.

It is my understanding you have to have "Team" enabled within the hub in order to use it. This feature itself is very subtle. You would very much miss it if you don't know this existed.


This feature can only be accessed if you are the Project Admin for this particular project. You can find it under Project Admin --> Services tab --> Design Collaboration This is also where you create Team in the first place. 


Note that you won't even see this Schedule Publish option unless you check the box next to the specific team (e.g. Architectural here). One more thing though, you will need to have at least one model initiated to the cloud in that specific team folder for this "Schedule Publish" icon to appear.

Once Schedule Publish is selected, you can choose your preference. For some reasons, while I am preparing this post, only "Weekly" can be chosen as option. (I used to be able to choose daily as option). Then you can choose any day/time of your preference.


When all the options are set, you can move that slider to enable the schedule. 


Select Close and you are done. What it will happen is every week (e.g. Friday) BIM 360 will automatically publish a copy of the "live" Revit model to the site. It will be the last SWC (Sync with Central) version right before the scheduled time. As a result, a copy of the model is populated in the Team folder. 

You can click on the model and it will launch the online viewer for you. You can also download or share with your team. Most importantly for me, it creates an automatic archived file for the project.

This feature alone has saved our projects several times when we need to retrieve model elements from the previous version. 

I highly recommend your team to do this to take advantage of this feature. 

In closing, I hope I will have a bit more time to write more during this work from home situation. 

Stay safe everyone!


Thursday, November 7, 2019

BIM 360 Doc - Giving It a Home

We have been hosting many new projects on BIM 360 Doc these days. It's not a new concept of collaborating our work with our extended teams over the cloud platform anymore. I still come across with a handful of consultants that have not used BIM360 yet.

While providing an on-boarding process to get them up to speed, I would put a placeholder Revit file to where their own discipline folder resides. This way, it gives them some physical location to know where they should initiate their Revit model to. Since we are using the Team feature and restrict access for each consultant, this small step often helps the extended team.


To set this up, I still need to initiate each placeholder model one at a time.


Once this is done, it will show up from the open window dialog box.


I have a stack of these models ready to be used


To keep this file manageable, I use a blank Revit file and only model these "3D texts" so the initiation time to the cloud takes only seconds. 

Well, don't forget to delete these placeholder files (via the browser) once the consultants have their own up in the BIM 360 hub. 

What do you think?
Do you have any tips to share when collaborating your work over BIM360?
Send your comments then. 

Friday, August 17, 2018

Quick Way to Identify BIM360 Local File

I stumped on this the other day and thought it is interesting to share. If you have ever worked on any BIM360 (C4R) project, you should know by now that your local file resides on a hidden location other than your default Revit location.

From time to time, if you have sync issue between your local file with the central, you can run into issue where your local file gets corrupted. Autodesk has a KB article to walk you through the process of clearing out the local file. In this hidden location, your local C4R file does not resemble your actual file name; instead, it is named after some GUID number. In other words, you can't just find your corrupted local file and get rid of it. It takes some trial by error to clear out this folder when I first encounter this issue. From the KB, it tells you to open the journal file to determine the filepath of the damage model. I can tell you if you have never understand how to read a journal, this is going to be a tedious process. **You can however always clear everything inside the local cache but sometimes you can't afford to do so if you have a few projects working concurrently.**

The following tip might offer a quicker way to get to the damage model without opening the journal.
Reminder: You are doing this at your own risk!


In the event you have a corrupted local file. Go to Open --> file --> BIM 360, select your project hub folder and hit ENTER on your keyboard. Revit will prompt you with an error "BIM 360://your project hub name/......... File not found. Please verify the correct file name was given."

The one that starts with "{" and ends with "}" is the local file folder of your model.

Next, go to your window explorer and locate your user local data folder such as this:

%LOCALAPPDATA%\Autodesk\Revit\Autodesk Revit 20##\CollaborationCache

*Make sure you locate the correct Revit version.*

From there, your will see the same folder with the exact name ......


Go ahead to either move this folder out of this location or I normally just rename to a different name. Revit will then generate a "New" local file when you try to open the model again.

Hope this helps.
Happy syncing!


Sunday, June 3, 2018

Getting Rid of Stubborn System Family Using Revit Lookup

It all started with a tweet posted few days ago. Kieren Porter (@snowyweston) posted an image about some nasty system family type in the project.


It got my attention simply because I was in the middle of dealing with the exact same issue from one of my projects. I have been told this is a known issue by Autodesk and it is fixable. However, it was going on for weeks to try to have their support team to resolve the issue. 

So, what's the big deal, you might ask!? For some unknown reasons, these "rogue" family types starting to come up from nowhere and it created many types of tick mark, dimension style and text style on its own. All of a sudden, you have these non-company standard styles in your file, it really becomes an annoying issue. 


There is a number of ways to get around these issues, you can rename these dim style with "z" "Do no use" so user will avoid using them. Some dim styles can be purged using "Purge Unused". To get rid of them once and for all, it is not as straightforward. The reason being is that they are system family buried deep down in the Revit file, you can find the instance of the elements but its type will stay within the file.

From the same thread, people have responded with a few solution. Some said to use #dynamoBIM like John Pierson or using a 3rd party solution like Ideate explorer. **(For the record, I have not tried these yet as of the published post)

Out of my curiosity, I thought this could also be done using Revit Lookup.

I was introduced to Revit Lookup by my previous colleague like a year ago. Initially it was for me to understand how Revit organizes each group/type of elements under the hood.


To troubleshoot the issue, I first place a "rogue" type of dimension in a view (it can be any view including drafting view). Select the dimension (or the element), go to Revit lookup and choose Snoop Current Selection.

It reported a list of information associated with this element, it looks something like this...


2 items are important to know:

Id - which is the Revit element ID   (Instance)

GetTypeId - which is the Revit family type element   (Type)

Usually, it is the type ID that is "under the hood" so user would not normally get to it.
Now that I identify the type ID for this rogue dim style, I can use Select elements by ID from Manager tab


Type the type ID number in the field, once it is selected, hit Delete! It prompts me with a warning, hit OK. 


That's it! It is gone for good. (Hopefully)

Like I mentioned above, there are more than one way to resolve this issue, I thought this might offer a different approach.

You can learn more about Revit Lookup from this site to download the tool for yourself and it is free.

From Github

Revit Lookup Builds from 2015 -2019


Sunday, February 12, 2017

Vetting BIM content for your office

During the recent workshop at my Midwest offices visit, this same question was raised many times during the discussion. "Should we be downloading and using content from other websites for our project? If so, how do we know they are "okay" to use?"

Revit content has always been a popular topic throughout the years. Although many manufacturers have caught up with providing content for designers to use, they are not created equally. When the occasion arises where I need to "use" the content that I find from any website, I always go through this set of rules to vet the content. Below are the criteria I use to make my own assessment whether the downloaded content is good before I decide to make my own.

Disclaimer:
This is solely my own opinion and you should make adjustment to see it fits for your use. In addition, I use this logic when it comes to working on large scale projects/models. This can apply if you are the person managing the company's Revit content library.

**Edited on 2/26/2017** Family Category added.

Imported Geometry

Impact Level: 👎👎👎👎👎

This is probably my number one rule where no imported geometry whether it is from dwg, sat or skp format is allowed EVER. Period. You can't modify the geometry at all, can't apply material to the geometry (and set as instance parameter for material; although you can apply material through Object Style as a workaround). It comes with all kinds of baggage and will impact your model performance downstream.
I would avoid using family with imported geometry at all cost.


Sub-Category

Impact Level: 👎👎👎👎👎

Usually this is the result when there is an imported geometry introduced to the family, it brings all the "layers" from the CAD file and it turns these into sub-category under Imported Categories tab in Visibility Graphic setting. By loading the family to the project, all these sub-categories will carry over to your model; overtime, when you have other families with these rogue sub-categories, they will increase your filesize of the overall model.


Overdetail

Impact Level: 👎👎👎👎👎

I have seen this becomes more and more of an issue from families provided by manufacturer. The content from the manufacturer site will be modeled to match the "exact" size and shape per the specification, down to the nuts and bolts details. While having content with this kind of details could be useful if you need to take your scene/view for rendering or VR use, it will again weight down your model and navigating in 3D view will become significantly slow.


This family has geometry down to every single metal rod

(Unnecessary) Nested Families

Impact Level: 👎👎👎👎👎

I came across with these kind of families from many sites even some from the manufacturer. Essentially, the content creator of the family has no idea what they are doing at all. It has many nested families embedded in the host family but do not serve any purpose at all. The example below has over 17 nested families that are not being used at all; A "Door" family is nested into this chair which should not be there in the first place. The family size is over 5M, which is 5 to 8 times larger than the desired file size.


Raster Image

Impact Level: 👎👎👎

Raster images are another offender to contribute to large family file size. When I build my own content, occasionally I need to refer some images from a product or design for references, I could import the image to floor plan (or elevation view) and size the image accordingly. If you have images imported for any 3D family, the raster image will not display once you loaded in the project, it will only be stuck in the family. Hence, they can increase the file size too.


(Unused) Material

Impact Level: 👎👎👎

A few years ago I downloaded a chaise lounge family from a user community site. It was a nicely done family. When I examined it, there were over thousand materials in this family. Back in previous versions in Revit, you couldn't delete material using "purge unused", you could only delete the material one at a time in the material browser. *Now you can simply use Purge Unused.* Excessive material not only added to the family file size, they will migrate to the project file as well.


Filled Pattern & Line Patterns

Impact Level: 👎👎👎

From the same chaise lounge family, I was able to find hundreds and hundreds of Filled Patterns as well as Line Patterns, they will also contribute to the family file size overall.


(Too many/too less) Parameters

Impact Level: 👎👎

A good family should have parameters that are relevant to the family; For instance, family with material parameters that represent the geometry will allow the user to modify material in the project. Other parameters like width, length, depth of the family can be scheduled in the project.

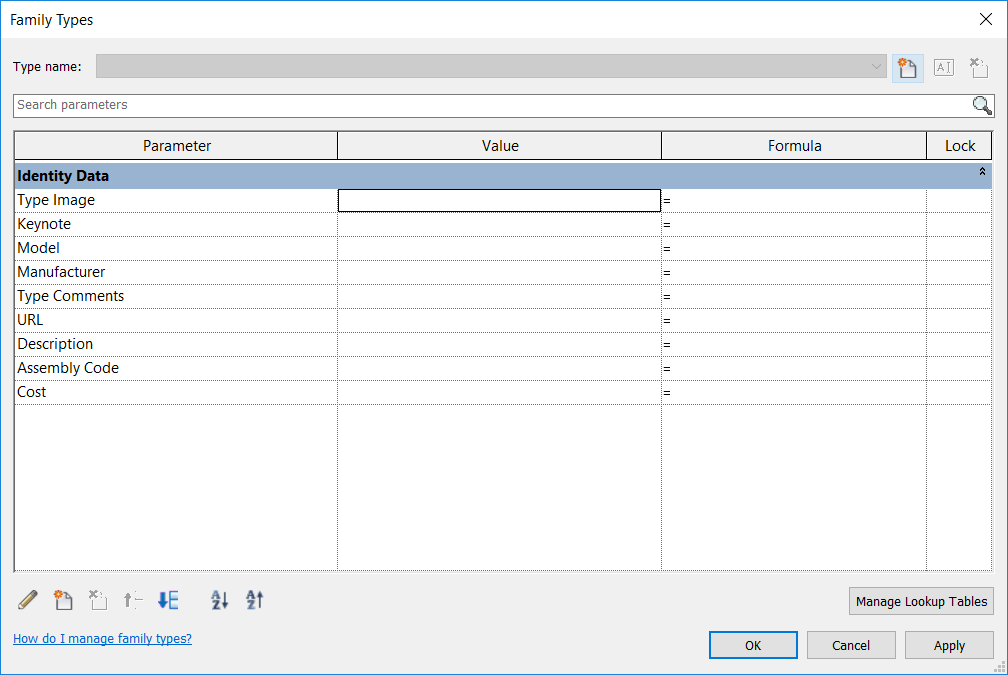
On the other hand, having too many parameters can be confusing too. If it is a parametric family, having too many parameters require the user to understand how to leverage or modify the value when needed. Manufacturer families come with many (shared) parameters that populate the product information; many others are supposed to use for FM. Unfortunately, different manufacturer has different naming, organization for these FM parameters and it is nearly impossible to use them cohesively in a project. I normally would delete the parameters that are irrelevant to the users.

Family with no parameter or value defined 

User needs to have a good understanding in order to use the family properly. 


Level of Details

Impact Level: 👎👎

Many manufacturer offered families like to create the family with "Coarse", "Medium" and "Fine" level of detail. While this might be a good idea, it always causes confusion to the users. Often times, the coarse level of the family is nothing but a box; this could be easily misread as something else in a project when your model has tons of elements in the space. I generally go to family editor and get rid of the geometry that associates with coarse level visibility setting.


Family Category

Impact Level: 👎👎

Another common issue from downloaded families are set to be the incorrect Revit category. One way to easily identify the category is to open the family in family editor, click the Family Category and Parameters icon. The example below shows this chair is set to Generic Model category. This will become an issue once it is loaded to the project, such as scheduling as well as Visibility/Graphic Overrides setting.


Insertion Point

Impact Level: 👎👎

Never let the 3D view fool you. I know first thing many people do after downloading the family is to use it in the project. Before you do so, always open the family in family editor and check the other views (ref. level, front, right, left...). I have this dumbbell rack family many years ago. While it looks decent in 3D view, it is not properly done. The insertion point (default insertion point is the interception of the vertical and horizontal ref. plane) is not centered in the family. When I check the front elevation, the entire rack is rested below the ref. level (finish floor) in the family. What it means is when I place this family to the project, it sits below finished level.
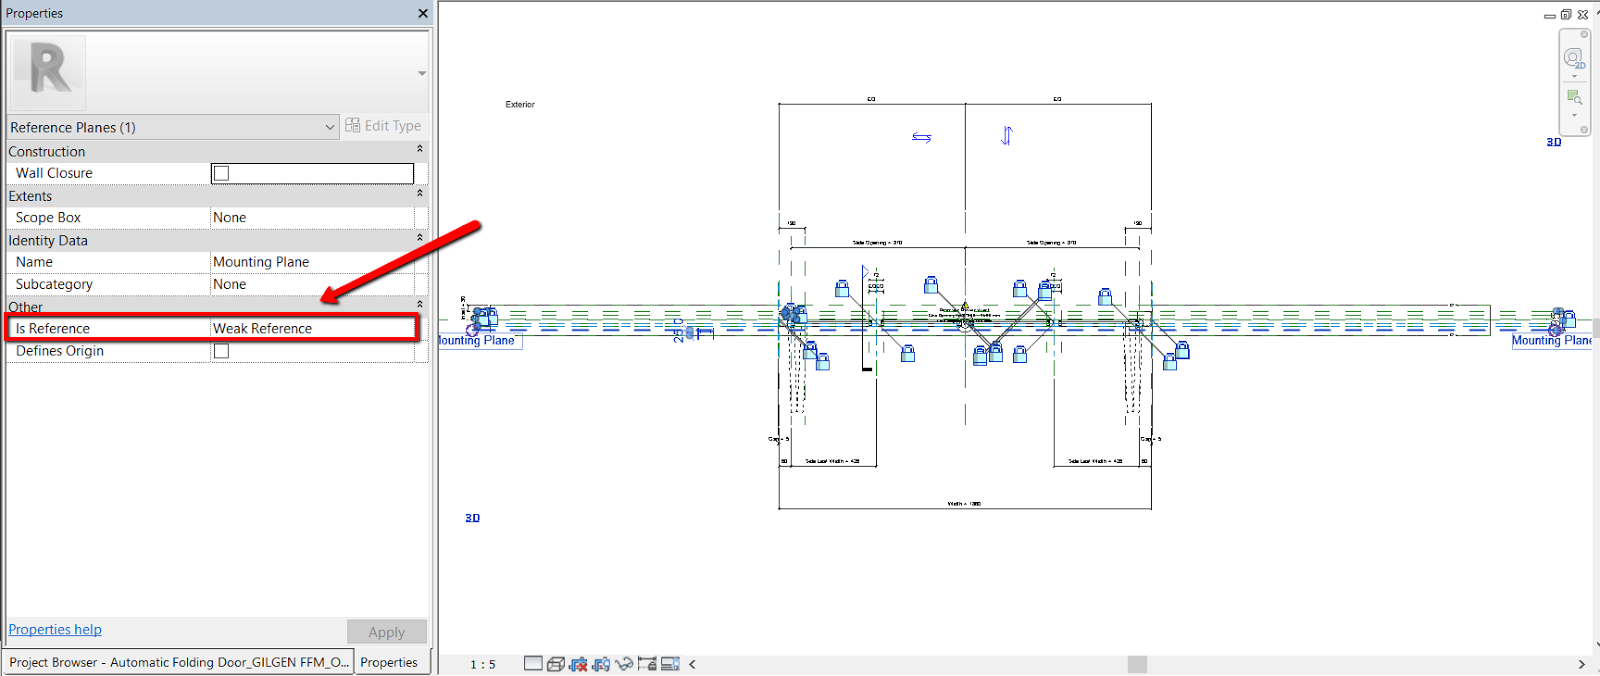

Reference Planes

Impact Level: 👎

This has nothing to do with file size but just good practice. Only set the reference plane that matters to the followings: Front, back, left, right, center (front/back), center (left/right), weak reference & strong reference. By assigning a ref. plane to any of this property will allow Revit to snap/dimension to adjacent element when selecting the family in project.  Turn all the others to "Not a Reference"; this way, Revit will ignore it. On the other hand, if the family has many ref. planes and all of them are set to "weak reference" or something like that, Revit will try to snap or dimension in the project. This could result in inaccuracy in the model. Steve Stafford has a good blogpost years ago to explain much more in depth about the purpose of ref. plane.


To conclude, I hope this provides some good guidelines when you choose to download families from any site. You should always do your due diligence to validate the family prior using it in your project.